

How To Grow Potatoes
Potatoes are a staple crop in British cuisine, and growing them in your own garden can be a rewarding and cost-effective endeavour. Whether you have a spacious plot or limited space in containers, growing potatoes is relatively easy and suitable for both experienced gardeners and beginners. In this comprehensive guide, we’ll walk you through the steps to successfully grow potatoes, from selecting the right varieties to harvesting a bountiful crop of these versatile tubers.
Choosing Potato Varieties:
Before diving into potato cultivation, consider the different varieties available. There are early, maincrop, late crop and salad varieties, each with its unique characteristics and best uses. Early varieties mature faster and are perfect for new potatoes, while maincrop varieties yield larger tubers and are suitable for storage. Salad potatoes are typically smaller and have a waxy texture, making them ideal for salads and boiling. Choose the varieties that best suit your preferences and garden conditions.
If you’re in the north of the UK, or an area prone to suffering blight, Sarpo seed potatoes (pronounced Sharpo) tend to have unbeatable blight resistance, allowing crops to be grown successfuly in even the worst affected areas.
Preparing the Soil For Growing Potatoes:
Potatoes thrive in well-drained, fertile soil. Begin by clearing the planting area of weeds and rocks. Ideally, prepare the soil in autumn by digging it to a depth of about 8-10 inches (20-25 cm) and incorporating organic matter, such as compost or well-rotted manure, to improve its structure and nutrient content. If not done in advance, prepare the soil a few weeks before planting to allow it to settle.
Chitting Potatoes:
Chitting is the process of encouraging seed potatoes to sprout before planting. This step is optional but can help jumpstart the growth of potato plants. Place the seed potatoes in a cool, bright location with their most “eyes” facing upwards. Many people find egg boxes or trays ideal for storing seed potatoes whilst chiting. Leave them for several weeks until the sprouts, or chits, reach about 1 inch (2.5 cm) in length.
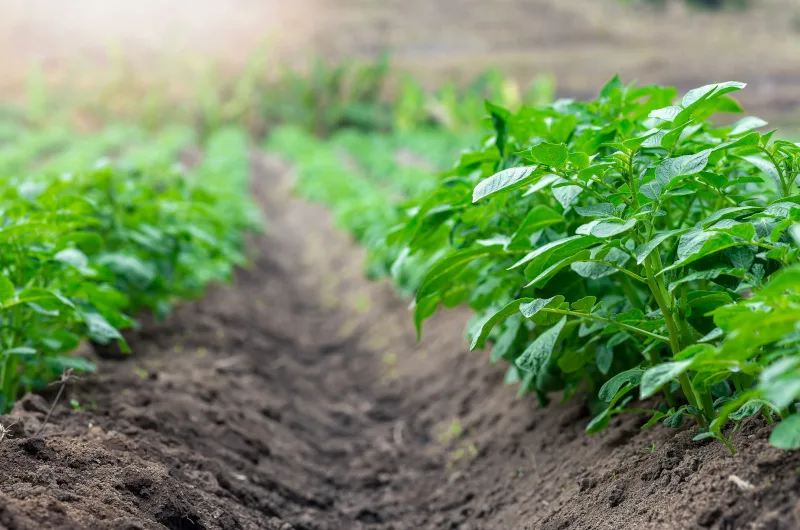
Planting Potatoes:
In the UK, the best time to plant potatoes is typically from mid-March to mid-May, depending on the variety and local weather conditions. Dig trenches or holes in the prepared soil, spaced about 2 feet (60 cm) apart for early and salad potatoes, and 2.5-3 feet (75-90 cm) apart for maincrop potatoes. Place the seed potatoes, with the chits facing upwards, into the trenches or holes, burying them at a depth of around 4 inches (10 cm). Space them approximately 12-15 inches (30-38 cm) apart. Cover the potatoes with soil, creating a ridge or mound about 6 inches (15 cm) high, as this helps with drainage and prevents light from reaching the tubers, thus avoiding greening.
Watering and Earthing Up Potatoes:
Potatoes require consistent moisture to ensure healthy growth and prevent tuber cracking. Water the plants thoroughly after planting and continue to provide regular irrigation, especially during dry spells. Be cautious not to overwater, as excessive moisture can lead to disease issues. As the potato plants grow, earth up the soil around the stems once they reach a height of around 6 inches (15 cm). This process involves gently mounding soil against the stems, leaving the top leaves exposed. Earthing up promotes root development and prevents tubers from being exposed to sunlight, which can cause greening and bitterness.
Fertilising and Controlling Weeds:
Growing potatoes benefit from balanced nutrition. Apply a balanced fertiliser, such as a general-purpose organic fertiliser, at planting time and again when the plants reach a height of around 6 inches (15 cm). Take care not to over-fertilise, as this can lead to excessive foliage growth at the expense of tuber formation. Regularly inspect the potato patch and remove any weeds that compete with the plants for nutrients and water.
Mulching
With summer temperatures seemingly increasing all the time, it can be beneficial to mulch potato ridges. I find covering the entire ridge in grass cuttings is a great way to do this (but make sure the grass being used hasn’t been treated with weed killers!). The cuttings prevent moisture evaporating and help suppress weeds and, comparing side by side, I’ve found crops mulched in this manner are noticably more productive. When the time comes to harvest, the cuttings get mixed into the soil and will break down over winter, benefitting next year’s crop. If I run out of rows to mulch, I’ll even apply a thick layer of cuttings between rows, which then compost in situ in a similar manner. Potatoes tend to naturally break up soil, so following these steps can result in beautifully friable, moisture retentive soil.
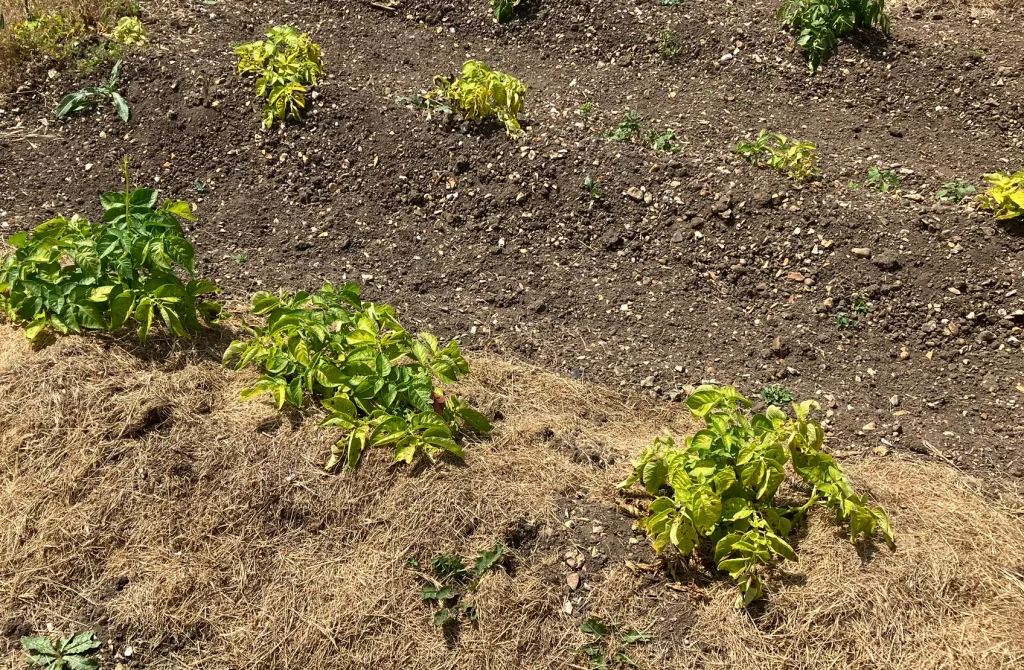
The below image shows two rows of early potatoes planted at the same time. The row in the foreground have been earthed up and mulched with grass clippings. The row in the background were just earthed up. As the heat of summer has arrived, the plants are starting to yellow and die back, but the mulched plants remain greener thanks to more retained moisture and will continue to develop tubers for longer, resulting in a better crop.
Protecting from Pests and Diseases:
Potatoes are susceptible to various pests and diseases, including potato blight, aphids, and potato cyst nematodes. Choose disease-resistant varieties when possible and practice good garden hygiene by removing any infected plants or tubers. Monitor the plants regularly for signs of pests or diseases and take appropriate action, such as using organic pest control methods or seeking advice from your local garden centre.
Harvesting Potatoes:
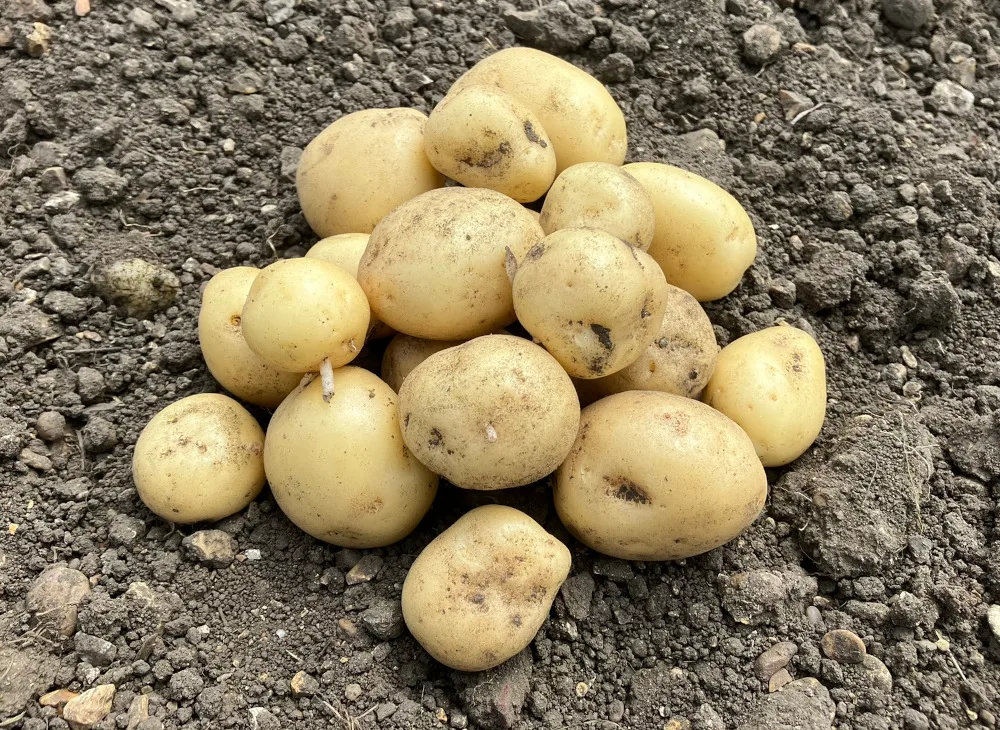
The time to harvest potatoes depends on the variety and intended use. Early potatoes can be harvested as soon as the plants flower and the tubers are the desired size, usually around 10-12 weeks after planting. Maincrop varieties are typically ready for harvest when the foliage turns yellow and begins to die back, usually 16-20 weeks after planting. Carefully dig around the plants with a fork, taking care not to damage the tubers. Gently lift the potatoes from the soil and allow them to dry on the surface for a few hours before storing or using.
Storing Potatoes:
To store potatoes over winter, gently brush off any large chunks of earth, but don’t fully clean. Leave for a few days in a cool place until any remaining soil fully dries, then inspect the tubers for damage or green colouring. Damaged tubers can have the damaged sections removed and be eaten, but never consume green potatoes. Place the remaining good tubers into hessian or paper potato sacks, then store in a cool, dark place, preferably between 5-10°C and where there is no risk of freezing. Stored in this manner, tubers can last up to 6 months, but it’s not a bad idea to check sacks periodically in case any of the tubers are degrading. Removing any decomposing tubers quickly will prevent damage to the remaining crop.
Frequently Asked Questions
Is chitting seed potatoes necessary?
It’s perfectly acceptable to plant seed potatoes without chitting. Indeed, commercial potato crops are sown in this manner. However, many gardeners are of the opinion that chitting results in a better or earlier crop.
How can I tell when potatoes are ready to harvest?
The main guiding factor is the plants flowering. Once the plants flower, and the flowers die back, the crop is likely to be ready to harvest. In the first instance, we’d recommend gently brushing away earthed up soil around a single plant in order to gauge the size of the tubers. If the first few tubers unearthed are excessively small, cover them over again and leave more time for the tubers to enlarge.
What are the best potatoes for making chips?
Russett, King Edward or Maris Piper are all great options for chips.
What variety potatoes are best for roasting?
Apache, Elfe, Kestrel, King Edward, Maris Piper and Rooster are all great options for roasting, with Rooster probably the best of the bunch.
What variety of potatoes are best for mashing?
Desiree, Elfe, Marabel, Maris Piper, Rooster and Vivaldi are all great varieties for mashing. We’d recommend trying Marabel, which gives a particularly creamy textured mash.
What potato variety is best for baking?
Elfe, King Edward, Maris Piper, Osprey, Rooster and Vivaldi are all great options. We’d recommend trying Osprey for its smooth skin if you like to eat baked potato skins and Vivaldi for its rich creamy taste, which compliments sauces and dressings.
Growing potatoes in your British garden is a rewarding experience that allows you to enjoy this versatile and nutritious crop at its freshest. There’s nothing better than the taste of the very first new potatoes in early summer. Just don’t forget to sow some mint, which adds the extra special touch when cooking. We’d also recommend planting an asparagus bed. Once established, it’ll still be producing spears just as the new potato season kicks off. New potatoes and fresh asparagus is a real gourmet treat and fabulous paired with a nice steak!

3 thoughts on “How To Grow Potatoes”